Midnight Floral Foam Art – Solving a Design Challenge
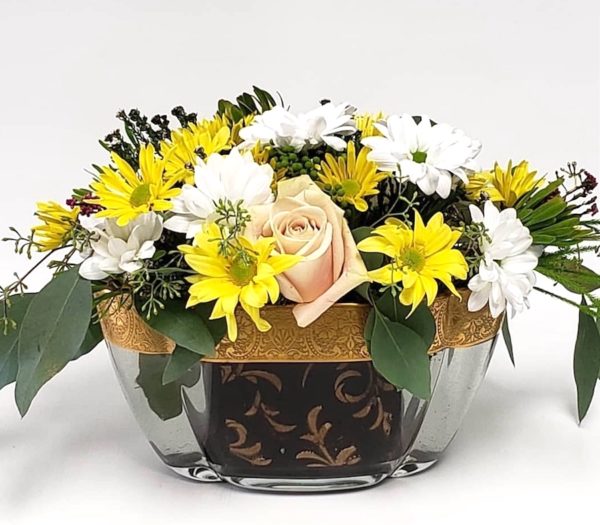
“A customer ordered a Thanksgiving centerpiece, then dropped off her favorite container,” says Thia Smith, a florist in Albuquerque. The design challenge? “We had to figure out how to secure flowers in her clear glass bowl without damaging the delicate metallic gold rim,” Thia explains.
She met the challenge using Midnight floral foam as an art form.
How? Thia shares design tips for using this new technique.
The Design Challenge
Customers often bring treasured containers into flower shops that are hand-painted, antique, expensive crystal, have a fragile or metallic rim.

It’s a challenge to secure the flowers without risking damage to a delicate container.
Glue-based waterproof tape or chicken wire (florist netting) can’t be used without risk of marring or scratching the vase. Tightly wedging foam doesn’t leave a water reservoir for the flowers.
What’s a florist to do?
Inventive Idea
When it comes to floral design challenges, necessity is often the mother of invention. Thia invented a new look.

When the customer brought her vase into Silver Springs Floral, Thia considered her options.
- Covering classic green floral foam with foliage looks good but adds expense.
- Midnight floral foam visually recedes in a vase but didn’t carry the design theme.
- Wire armatures are more flexible than chicken wire but could possibly scratch.
Suddenly, Thia had an interesting idea.
Using Design Master spray paint and a fleur-de-lis stencil, she embellished the Midnight floral foam on all sides before placing it into the gold-rimmed container.
“Our customer thought it looked fabulous because the pattern repeated the gold of the rim,” says Thia.
Using stencils on foam
“A wide variety of stencils can be found at craft stores or you can choose wallpaper stencils for larger designs,” she explains.
How can you create this floral foam art?
- Place a selected stencil over a block of foam.
- Spray Design Master paint over the stenciled foam in light, even strokes.
- Leave the stencil in place for a few minutes until the paint is fairly dry.
- Remove the stencil carefully.
- Allow the painted foam to dry for about 15 minutes before placing in water.
Thia expanded the idea by using other methods.
Splatter Paint Art
She decided to try a colorful, artsy look for Easter.
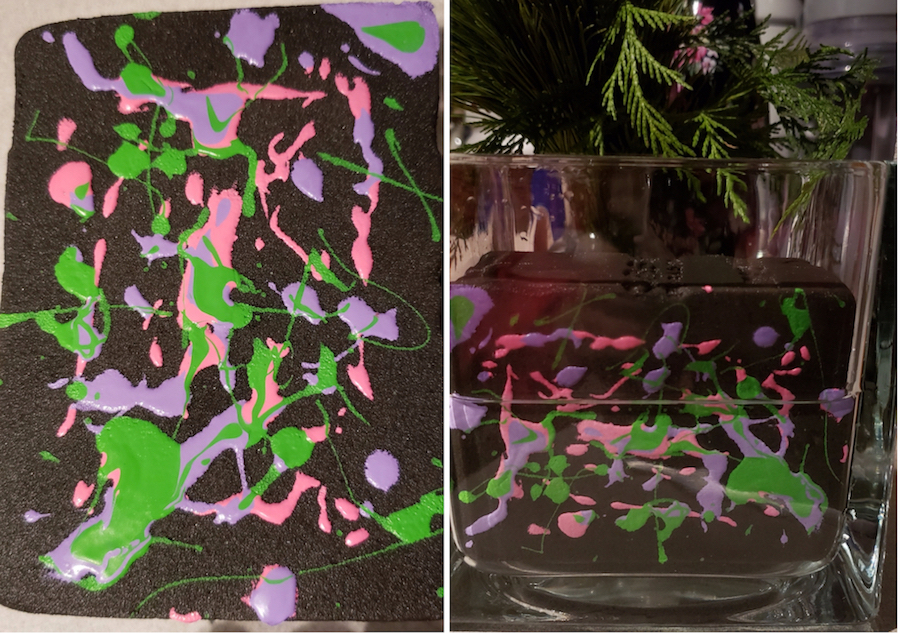
Thia bought $2 paint samples of heavier latex paint from the hardware store and developed a splatter technique.
“We use a lot of clear 5-inch design cubes” says Thia. “The 5-inch floral foam cube fits inside perfectly.”
She suggests pre-painting the foam cubes ahead of time. When needed – pop each decorated foam into a glass cube, add water and flowers.
“You can line up the foam cubes on a table and splatter paint over the whole row at once,” adds Thia.
- Apply paint to blocks or cubes of dry foam.
- Choose at least three coordinating colors.
- Drizzle one color at a time over the foam.
- Fill a paintbrush and shake it over the foam splattering the paint.
How long will paint last on the foam?
“To test it, we painted a foam, then wet it. We left it sitting out in the shop for about three weeks and it still looked good,” says Thia. “Finally, we just got tired of cleaning around it and trashed it,” she laughs.
What other artisan styles can be explored?
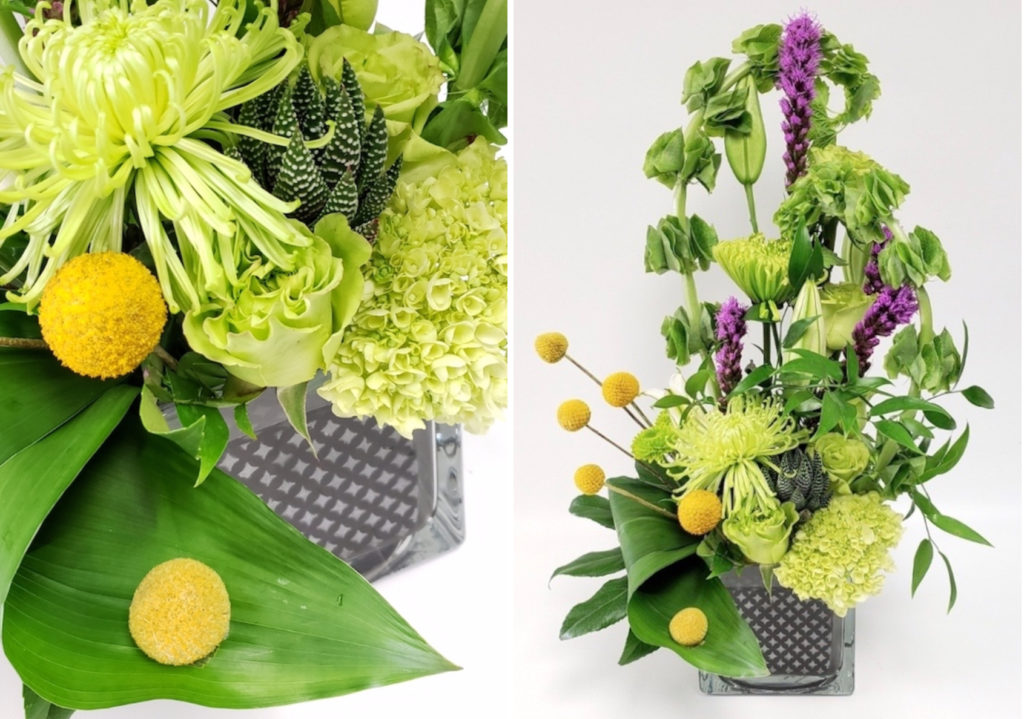
Designs using cookie cutters, rubber stamps, biscuit cutters,floral picks, balloon picks, etc.
Exploring New Ideas
While cookie cutters are often used, this is no cookie-cutter process.
Rather than fill the cooler with designs to sell each day, Thia and staff prefer to prep materials and containers in advance so they can quickly adapt orders to specific requests.
When cutting out shapes, consider the desired width of the forms. Adjust by slicing floral foam into thinner pieces to cut from.
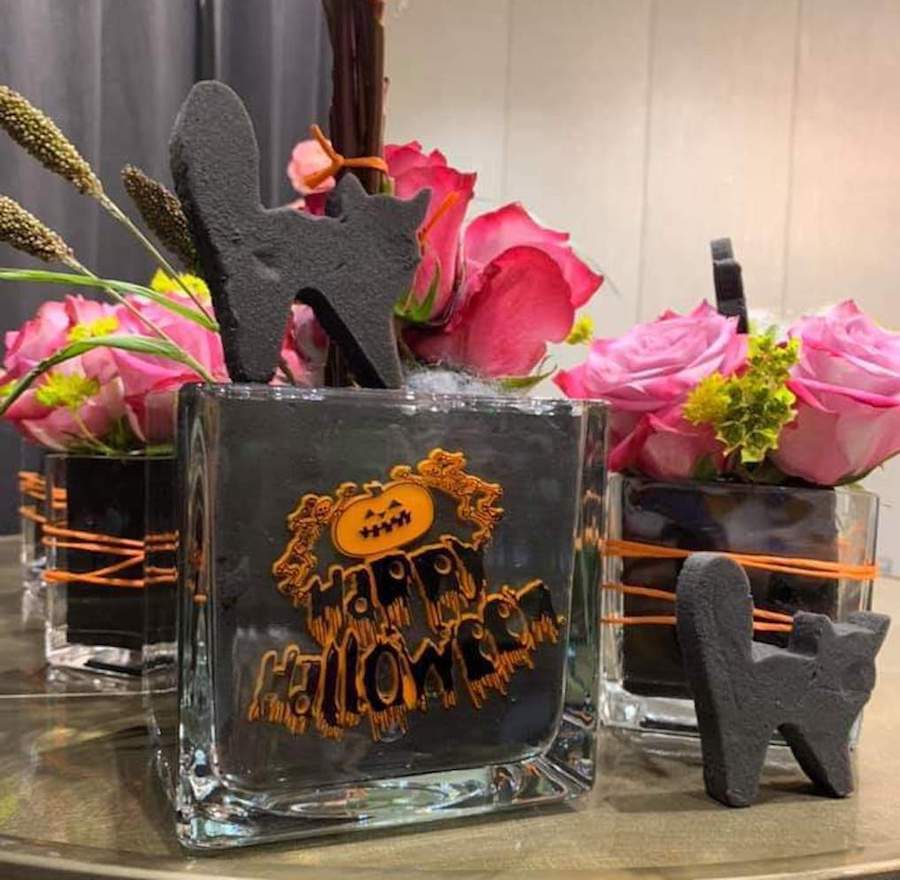
For Halloween, use cookie cutters to cut black cats. Biscuit cutters for circles. Stencils for shapes and letters. Rubber stamps for images. This work feels like child’s play!
The floral foam cube fits snuggly in a cube, so floral picks pressed into the edge of foam stay in place.
Thia quickly realized her floral foam art could also deliver messages.
Personalized Messages
She explored using personalized messages for everyday designs.
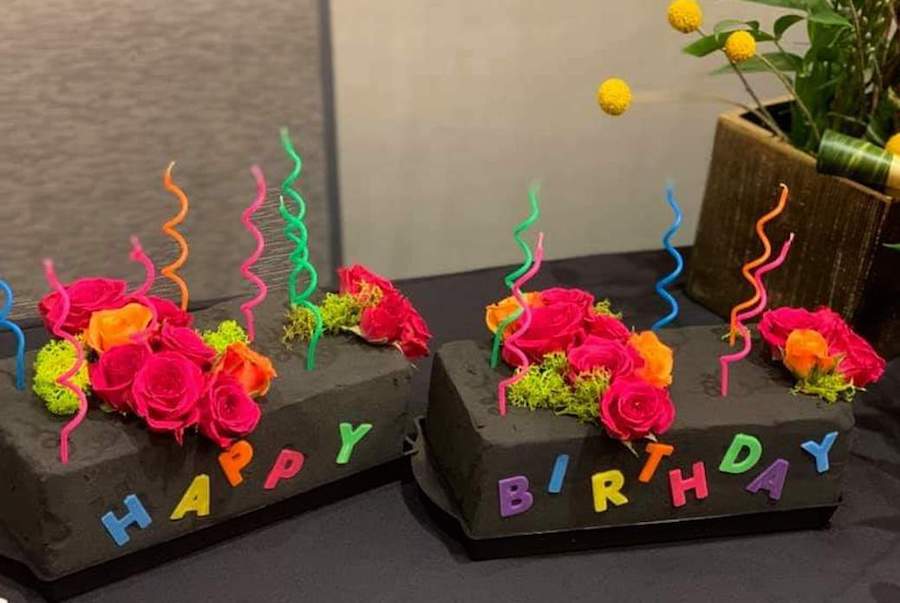
Happy birthday. Happy anniversary. Congratulations. Get Well. Add flowers, candles, etc. to personalized foam and create an instant celebration.
Simply place a block of Midnight floral foam into a brick tray (single, double or triple) and add décor.
Children’s magnetic alphabet letters from the toy department or foam letters from a craft or Dollar Tree store can be pressed lightly into the foam to deliver a message.
For a rehearsal dinner tablescape, the names or initials of a couple can be stenciled on the sides of foam bricks. Line the foam down the center of the table and fill them with flowers.
Pricing the Products
The cost of adding foam art to a design is priced as ‘materials + labor’ as any other ornamentation would be.
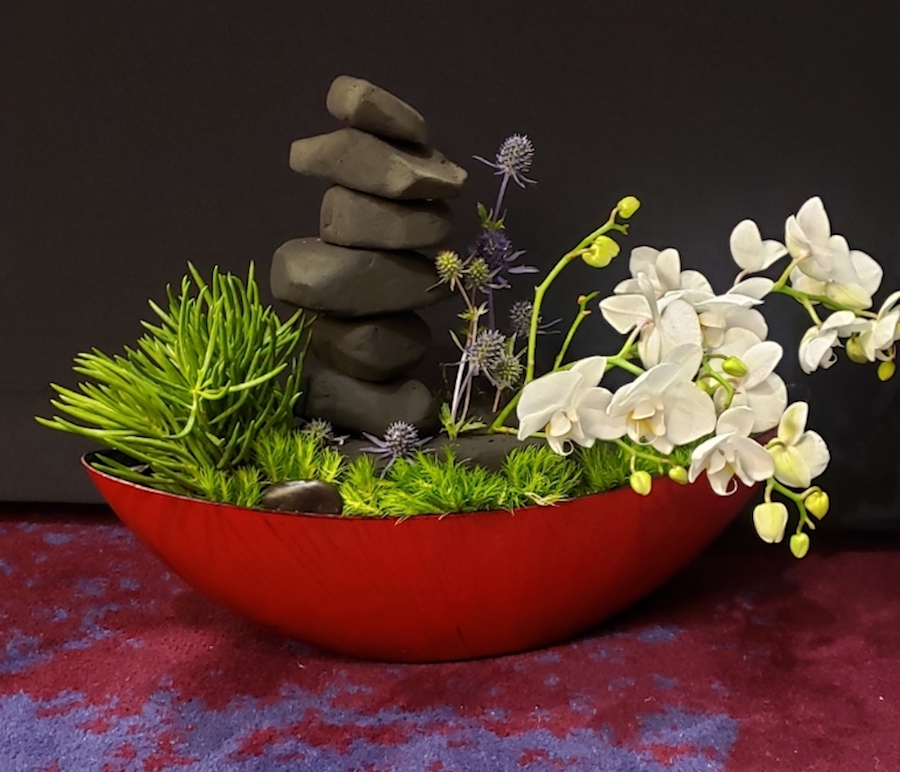
The ‘stones’ in this design were formed from Midnight floral foam. The number of stones determines the additional cost in the price.
Labor plays a big part in determining the price. Sometimes, easily accomplished larger designs can cost less. While smaller stencil designs requiring more patience and drying time, may cost more. The number of decorated sides also affects cost.
Depending on the cost of paint, stencil, add-ons like letters, candles, accessories, and size of foam – Thia estimates the foam art application usually adds about $6 – $7 per design.
It’s Genius!
How did the first Midnight Floral Foam Art customer respond when she picked up and paid for her artistic design?

“She just thought we were total geniuses, at that point,” replies Thia with a laugh.
What innovative ideas can you suggest for using Midnight floral foam to create art in your flower shop?


Leave a Reply